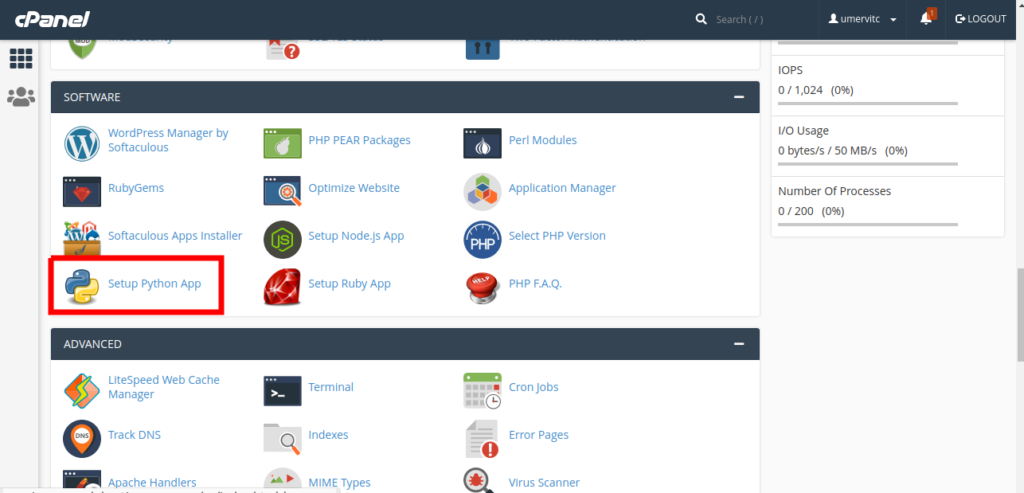
Create a Python App
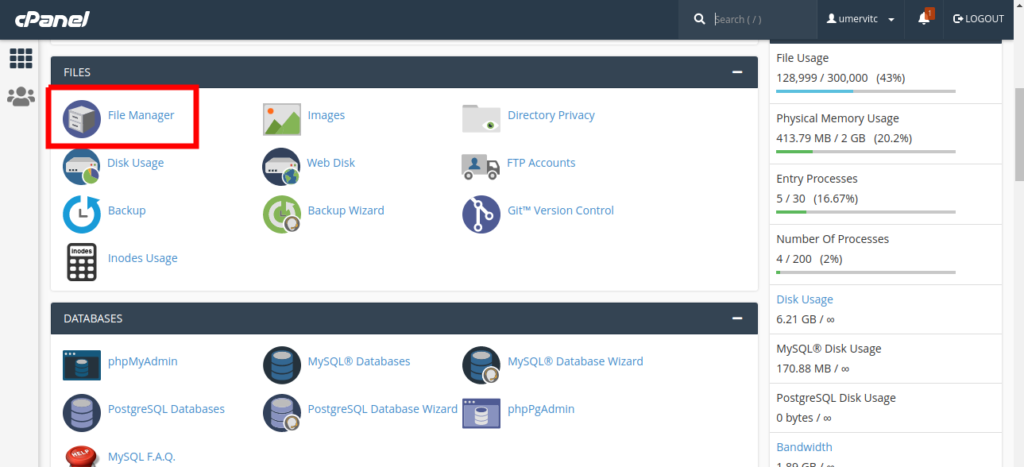
Log in to CPanel and open Setup Python App.
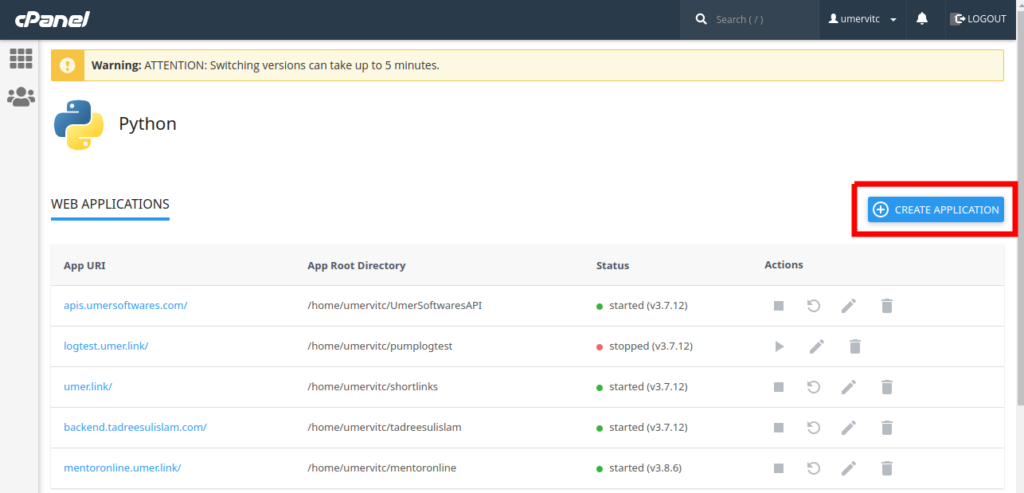
Click on Create Application
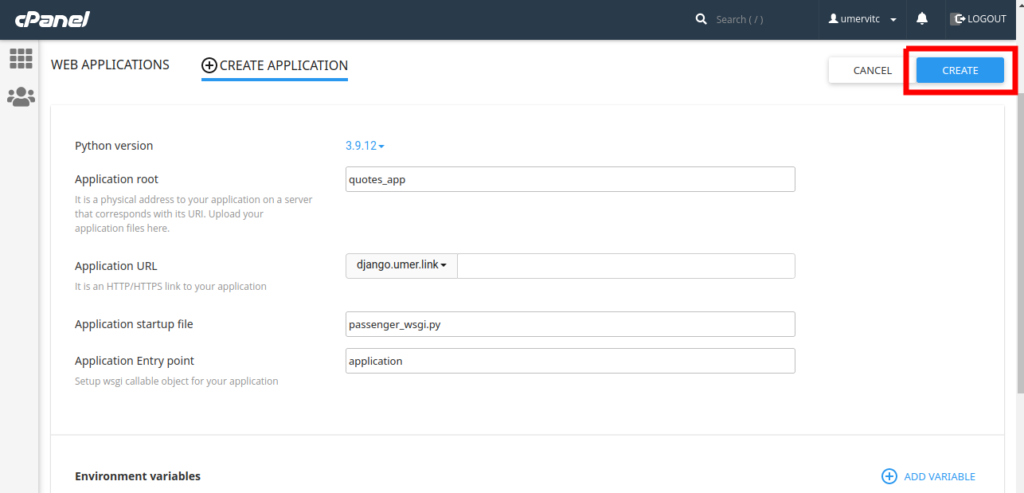
- Select Python Version 3.9.12
- Application Root is the directory where you will place the code files of your Django project. Make sure that it is a different folder than your domain root.
- Application URL is the domain or subdomain where your app will run
- In the Application Startup File, type passenger_wsgi.py
- In the Application Entry Point, type application
After setting all these, click on the Create button.
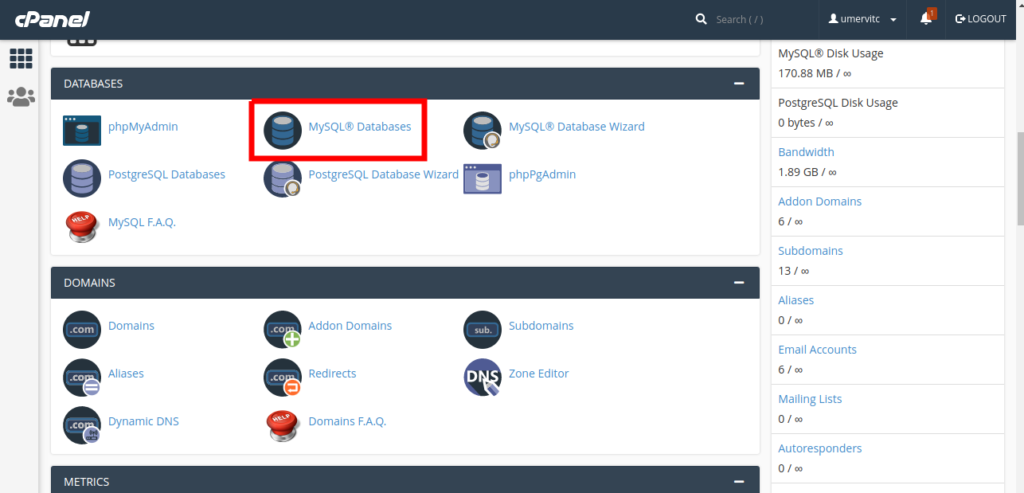
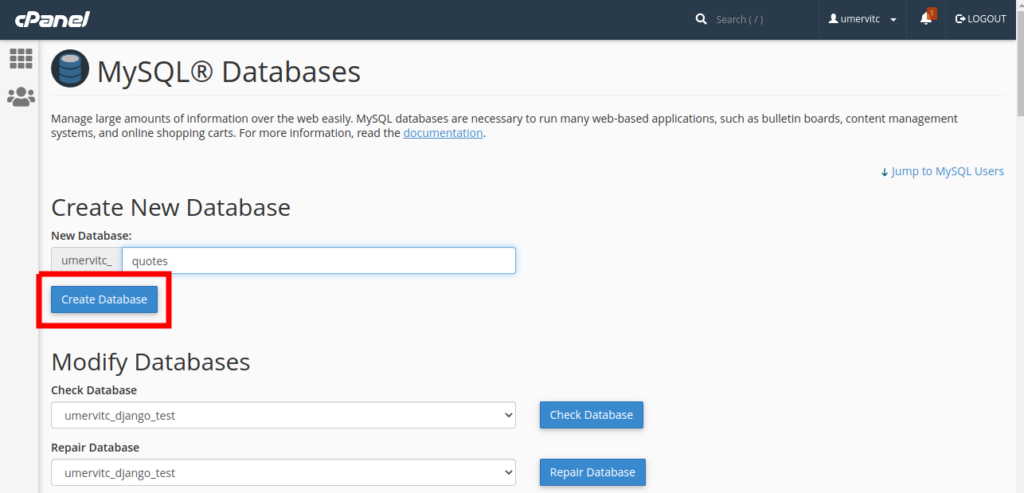
Setup the Database
Open MySQL Databases in Cpanel
Create a new Database and note the database name. We will need it later.
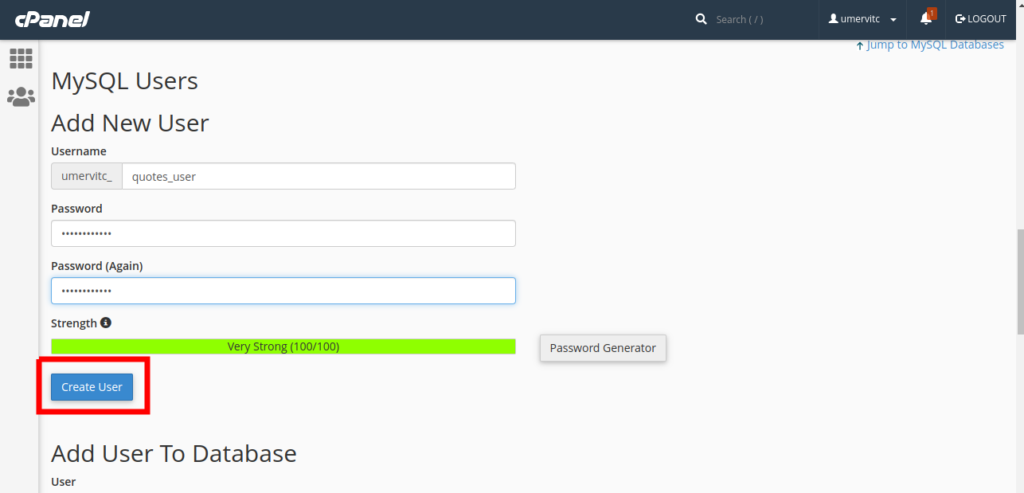
Create a new MySQL user and note the username and password. We will need it later.
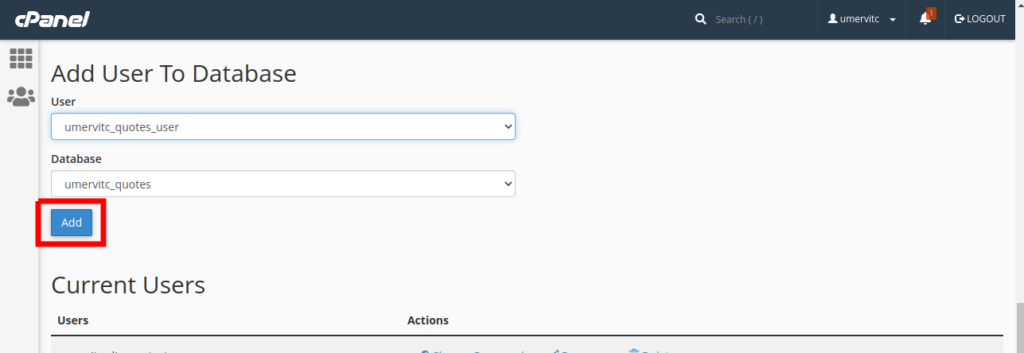
Add the new user to the new Database
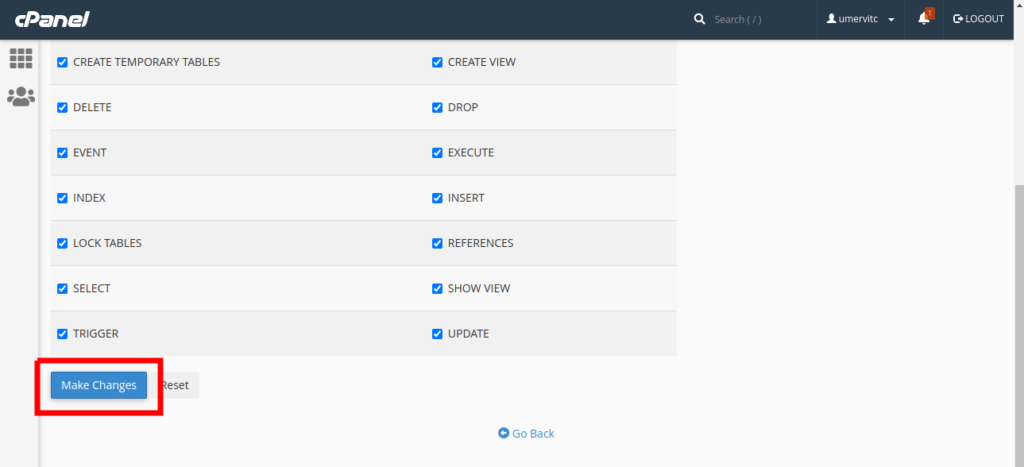
Grant all the permissions to the user and select Make Changes

Upload your project
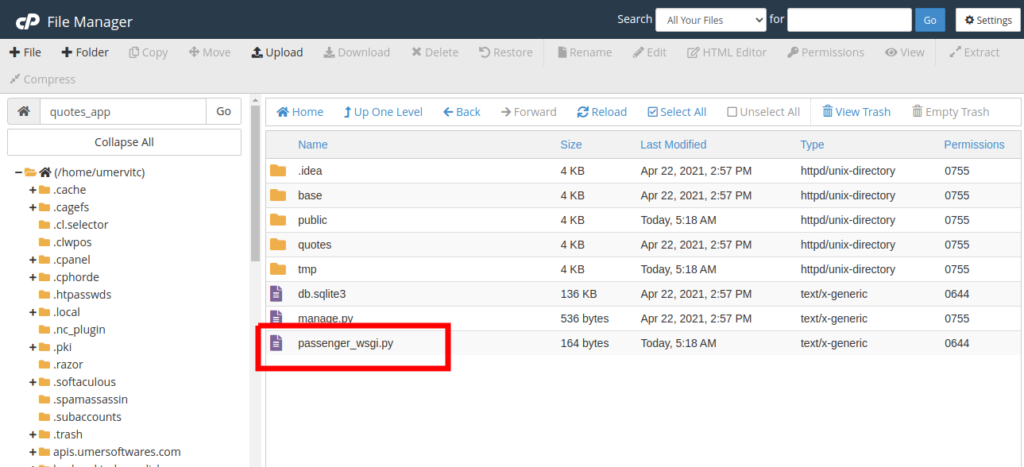
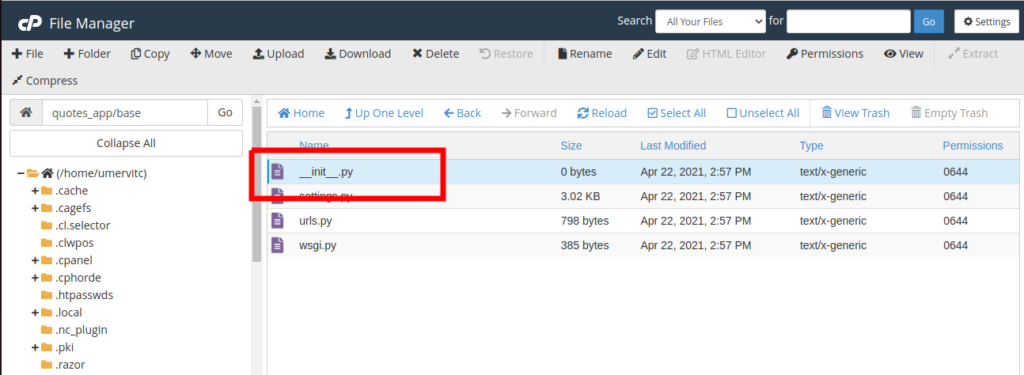
Open the File Manager and go to the Application root you specified in the part 1
Zip your project. Upload it to this folder and extract the zip file. Your project files should be in the same folder as the passenger_wsgi.py file. Make sure that manage.py and passenger_wsgi.py are in the same folder.
Edit the passenger_wsgi.py file.
Delete everything from this file and add the following code:
from base.wsgi import applicationCopy
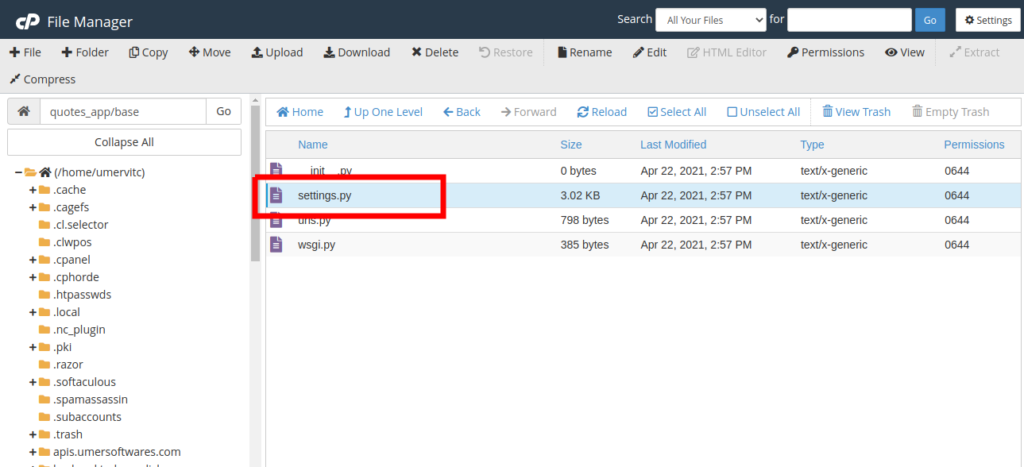
Where base is your project folder. It is the same folder that contains your settings.py file. It will be different if you are not using the test project that I provided. You can locate your wsgi.py file and import application from it.
Now edit your settings.py
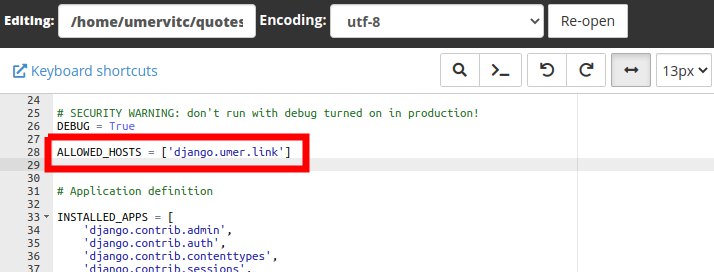
Add your domain to the ALLOWED_HOSTS list. If there is a www version of your domain, add that too. Do not use http:// to https://ALLOWED_HOSTS = ['django.umer.link']Copy
In the DATABASES dictionary, modify the default database. 'default': { 'ENGINE': 'django.db.backends.mysql', 'NAME': 'databasename', 'USER': 'databaseusername', 'PASSWORD': 'databasepassword', 'HOST': 'localhost', 'PORT': '3306', }Copy
Make sure to replace databasename with the database name, databaseusername with the database username and databasepassword with the database password.

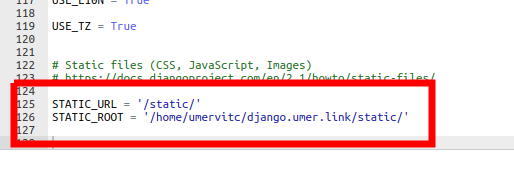
Now go to the end of the file, modify STATIC_URL and add the STATIC_ROOTSTATIC_URL = '/static/' STATIC_ROOT = '/home/username/domainroot/static'Copy
Replace the username with your CPanel username. The domainroot will be public_html if you are deploying on the main domain of your hosting account. If you are deploying on a subdomain or an add on domain, it will be name of the addon domain or the subdomain.
Now edit the __init__.py file
Add the following codeimport pymysql pymysql.install_as_MySQLdb()Copy
Complete configuration from the Terminal
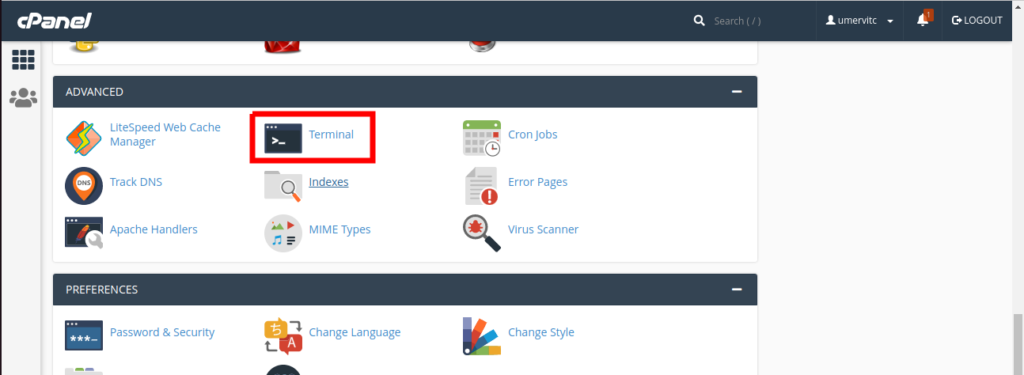
Open the Terminal in your CPanel. If you can not find the terminal, go to Manage Shell and Enable SSH Access. You can also do these steps using SSH but using the terminal is easy.
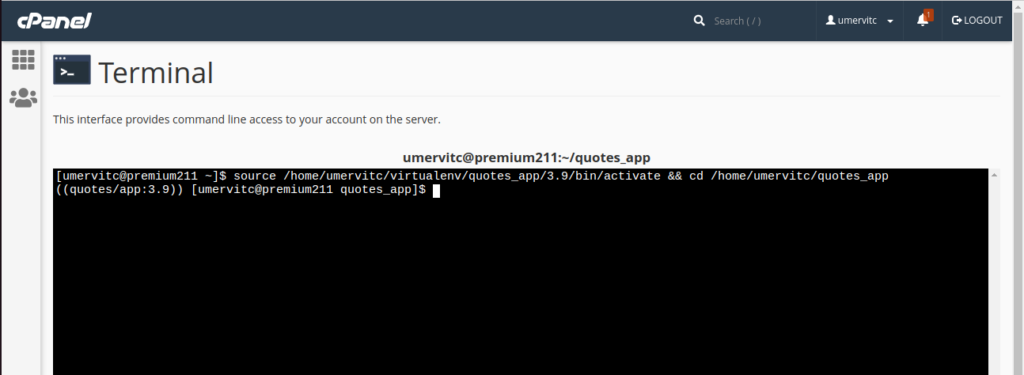
Copy the command to enter the virtual environment from your python app.
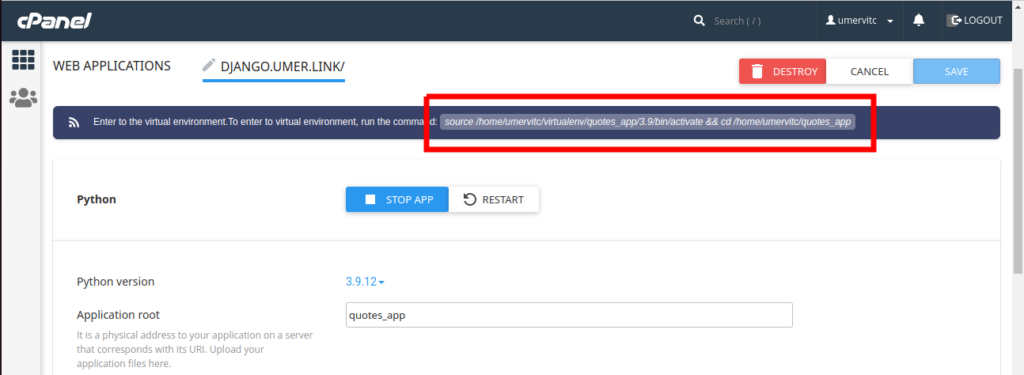
Run the copied command in the terminal and press enter to enter the virtual environment,
Install Django 4.0.4 by running the following command.pip install django==4.0.4Copy
pymysql is required for using the MySQL database. Install it using pip. Here you will install any other modules required by your Django app.pip install pymysqlCopy
If your migrations are not complete, then make migrations.python manage.py makemigrationsCopy
Run migrate to create tables in the database.python manage.py migrateCopy
Run collectstatic to move the static files to the static root folder specified in settings.python manage.py collectstaticCopy
Run createsuperuser to ass a user to the Django admin panelpython manage.py createsuperuserCopy
Finally, restart the python app.

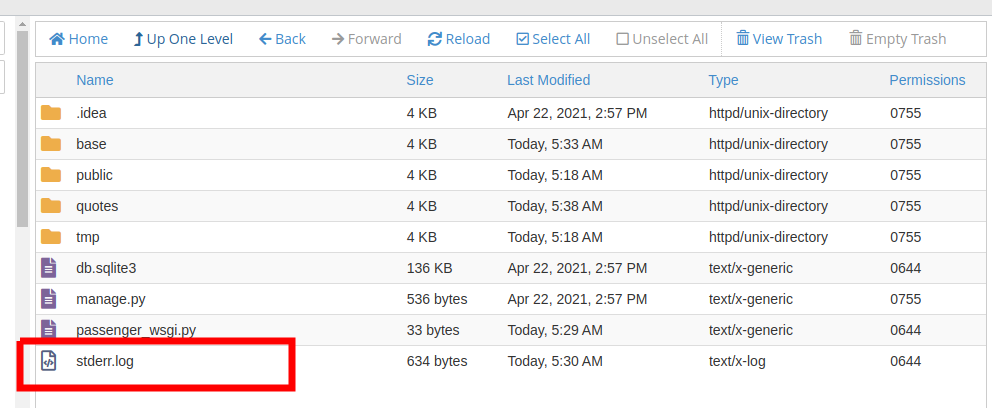
Your Django app is deployed successfully. Open the url of your app to see if it is working fine. If you see the phusion passenger error page, you can find the error in the stderr.log file for debugging.
Reference: https://pythonfusion.com/deploy-django-on-shared-hosting/